How to Colour Your Hair At Home: Expert Advice
Dyeing your hair at home can be an exciting way to express your individuality and refresh your look. Whether you’re aiming for a bold new shade or simply covering up some grey, Sally Beauty is here with expert advice to ensure your DIY dye job is a success. Our goal is to make the process straightforward and fun, with all the tips and tools you need to achieve salon-worthy results right in your own home.
Hair Colour 101: Understanding the Basics
What is Hair Colour? Hair dye is an artificial pigment used to change the natural colour of your hair. It involves a chemical process that affects both the depth (from dark to light) and the tone (such as red, copper, or ash) of your hair.
How Do I Dye My Hair at Home? Dyeing your hair at home depends on the type of dye you’re using and whether a developer is needed. Always start by carefully reading the instructions on your dye. Here’s a general guide to help you get started:
- Wear gloves to protect your hands.
- Perform a patch and strand test to ensure you won’t have any allergic reactions and that the colour result is what you expect.
- Mix the dye and developer according to the manufacturer’s guidelines
- Apply the dye following the instructions, which may vary depending on whether it’s your first time dyeing or you’re touching up roots.
- Rinse, condition, and dry your hair thoroughly after processing.
What Type of Hair Dye Should I Use?
There are 3 major types of hair dye someone can use described below and which one you choose depends on how long you want the colour to last and how much grey hair you’d like to cover.
Permanent Hair Colour
If you’re looking for long-lasting results with up to 100% grey coverage, permanent dye is your go-to. This type of dye alters your hair’s internal structure, providing a permanent change that won’t wash out. This is sometimes called lightening or lifting hair colour.
- Pros: Long-lasting with permanent colour change.
- Cons: May change your hair’s texture and requires root touch-ups every 4-6 weeks.
- Top Tip: This requires a developer so always follow the manufacturer’s instructions and wear gloves. A patch and strand test is essential to avoid unexpected results.
Semi-Permanent Hair Colour
For those who want to experiment with vibrant shades or blend grey hairs without a long-term commitment, semi-permanent dye is ideal. It lasts for 4-12 washes and is less damaging than permanent dye.
- Pros: Enhances and refreshes your colour without a drastic change.
- Cons: May require pre-lightened hair for the best results.
- Top Tip: Some may require the use of a developer. Always follow the manufacturer’s instructions and wear gloves. A strand test is key, especially when trying out bold colours.
Demi-Permanent Hair Colour
Demi-permanent dye is perfect for those wanting to cover grey, lighten, darken, or change their hair tone without the commitment of permanent dye. Unlike permanent dye, demi-permanent dye doesn’t penetrate the hair stand. However, it lasts up to 24 washes and gradually fades.
- Pros: Provides a natural look that blends grey and enhances colour.
- Cons: This dye will not lighten your hair and can darken if left on too long.
- Top Tip: This requires a low-volume developer so always follow the manufacturer’s instructions and wear gloves. Perform a strand test to gauge the final result.
How Do I Cover Grey Hair At Home?
If covering grey hair at home is your goal, a demi-permanent dye is
often the best option. It offers enough coverage while blending with
your natural colour, making it a popular choice for those with light
to medium grey hair.
When it comes to choosing the right dye, Sally Beauty recommends the
following brands to achieve professional results at home:
- Permanent: XP 100, Wella Professionals Koleston Perfect
- Semi-Permanent: XP 100, Crazy Colour, Wunderbar Freestyle
- Demi-Permanent: Wella Shinefinity, Redken Shades EQ
Hair Developer 101: The Key to Successful Dyeing
What is Hair Developer?
Hair developer is a vital part of the hair dye process, activating
the colour and allowing it to penetrate deep into your hair cuticle.
This step is crucial for achieving the vibrant results you want at
home. By opening the cuticle’s outer layer, the developer enables
the dye to deliver the exact shade you’re looking for. Containing
hydrogen peroxide, hair developer can either lift or deposit colour,
depending on your needs. That’s why choosing the right developer is
key to achieving the colour you desire.
Developers come in two main forms: liquid and crème. Liquid
developers have a thinner consistency, making them perfect for full
coverage, while crème developers are thicker, offering a spill-free
experience. Regardless of which one you choose, you can always count
on professional-quality results at home.
Depending on the brand, you might see developers referred to by
different names, such as processing solution, oxycream, peroxide,
hydrogen peroxide, or oxidant. Knowing what each type of developer
does is essential to getting the results you want without damaging
your hair or skin. Always exercise caution when using professional
dye and developer at home.
What hair developer should i use?
There are three major strengths of hair developer, each suited for
different dyeing goals. Whether you’re looking to maintain your
current colour depth, go darker, go lighter, or cover a significant
amount of grey, your choice of developer will be guided by these
needs.
10 VOLUME

You won’t get any lightening effect from a 10V developer, you will just be depositing colour onto the hair. This is ideal for going darker, but is unlikely to cover greys. Provides a gentle amount of lift (up to one shade) and is commonly used with demi-permanent hair colour.
20 VOLUME
This is great for blending grey, enhancing & refreshing colour, or going darker. Lasts up to 24 shampoo washes. It lifts and changes colour. The most commonly used developer, great for a colour refresh or to achieve full grey coverage.
30 VOLUME
Used to cover up grey, lighten, darken, or change your tone. Lasts up to 8 weeks. Good for if you’re looking to lift your colour and go vibrant. Best for when your goal is going a few shades lighter. Provides up to 3 levels of lift on natural hair.

What is Hair Toner?
Hair toner is your go-to product for neutralizing and adjusting unwanted undertones in bleached hair, whether warm or cool. It’s particularly effective on natural and bleached blonde hair, as it tweaks the undertone without lifting the shade. However, be cautious when working with red or brown tones, as toner can affect these colours differently. Think of toner as a top coat—it not only perfects your colour but also adds a glossy, healthy shine. Explore our selection of toners or check out our comprehensive hair toner guide for more advice.
Hair Dye Remover 101 – How To Correct Hair Dye
Can I Remove Hair Dye?
Yes, you can! If you’re looking to
correct or remove hair dye, a dye or colour remover is your best
friend. Whether you want to change your look or correct a mistake,
there’s always a solution. Colour removers work by eliminating the
artificial pigment in your hair, while leaving your natural colour
intact. However, keep in mind that colour removers won’t work on
temporary or henna dyes and aren’t effective on lightened or bleached
hair.
The effectiveness of a colour remover depends on your hair’s
condition. If you’ve made a recent dye mistake, a single application
should suffice. However, if you’ve been using dark dyes like black or
brunette for a long time, you’ll likely need multiple applications to
remove the dye build-up and rejuvenate your hair.
When using a colour remover at home, we strongly recommend performing
a patch test 48 hours beforehand to avoid any adverse reactions.
What Hair Dye Remover Should I Use? For a simple and effective
solution, we recommend Colour Undo.
Colour Undo is designed to make dye removal safe, simple, and gentle.
Its 100% vegan and ammonia-free formula, effectively removes both
semi-permanent and permanent dyes from your hair without compromising
its natural shine and softness. It’s perfect for creating a blank
canvas for your next dye adventure or embracing your natural grey
locks. However, it’s important not to use Colour Undo on bleached or
henna-treated hair, including plant- and herbal-based dyes.

How to Use Colour Undo
Colour Undo offers such a straightforward process that you can
easily use it at home. Here’s our step-by-step guide to ensure
successful dye removal every time:
Step One:
Mix equal parts of the Activator and Remover (approximately 50ml
of each) using the measuring bottles provided in your pack.
Step Two:
Apply the mixture to your dry hair with a tint bowl and brush.
Keep your hair saturated and cover it with a plastic head cap to
prevent drying. To protect your face, place cotton wool around
the cap. Let the mixture develop for up to 60 minutes, or until
you achieve the desired result, and rinse out with warm water
for 5 minutes.
Step Three:
Rinse out the formula from Step Two with warm water for 5
minutes. Lather approximately 25ml of the Buffer into your hair,
leave it in for 1 minute, and rinse thoroughly with warm water
for 5 minutes.
Step Four:
Repeat Step Three. Your Colour Undo process is now complete!
Patch and Strand Test: A Hair Dye Must-Do
Before dyeing your hair at home, always perform a patch test to check
for allergic reactions. Apply a small amount of dye behind your ear 48
hours before you plan to dye your hair. If you notice any redness,
swelling, or irritation, do not proceed with the dye.
A strand test is equally important to preview the final dye result on
a small section of hair before committing to dyeing your entire head.
This step is crucial, especially if you’re using a new dye or dyeing
your hair for the first time, as it helps prevent over-processing,
hair damage, and unexpected colour results.
Step One: Separate a small section of hair, about the width of
a pencil, from the rest.
Step Two: Put on gloves and mix approximately 1 tsp. of
developer with 1 tsp. of dye (check the specific mixing ratio for your
dye).
Step Three: Apply the colour mix to the strand and let it
process for the recommended time.
Step Four: Rinse the strand until the water runs clear, then
dry. If you’re satisfied with the result, proceed with dyeing your
full head within 48 hours
Must-Have Hair Essentials & Tools For Home Hair Dyeing
What Tools Do I Need to Dye My Hair at Home?
Bowl & Brush or Applicator Bottle
Avoid metal
tools when mixing your dye and developer. Use a non-metallic tint
bowl and apply the mixture with either a brush or a bottle.
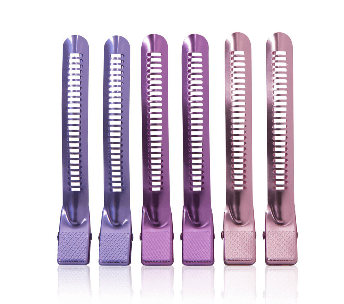
Combs & Clips
Section your hair using combs and clips to ensure even coverage
during dyeing.
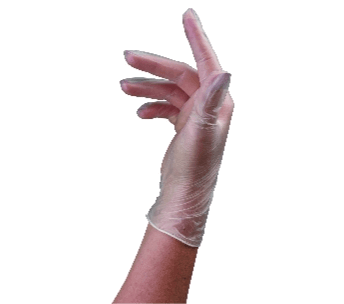
Gloves & Barrier Cream Apply barrier cream around your hairline to prevent staining, and always wear gloves to protect your hands while dyeing.
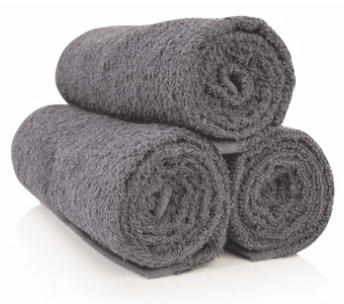
Towel or Cape
Protect your clothing by using a towel or cape during the dyeing
process.
Dyeing your hair at home doesn’t have to be daunting. With the right products, tools, and advice, you can achieve beautiful, professional-looking results. For all your home dye needs, from expert tips to top-quality products, Sally Beauty is your trusted partner in beauty. Ready to get started? Explore our wide range of hair dye to find everything you need for your next hair colour adventure.